Showing posts with label recycled projects. Show all posts

9.26.2011

Arched Mirror Frame Makeover

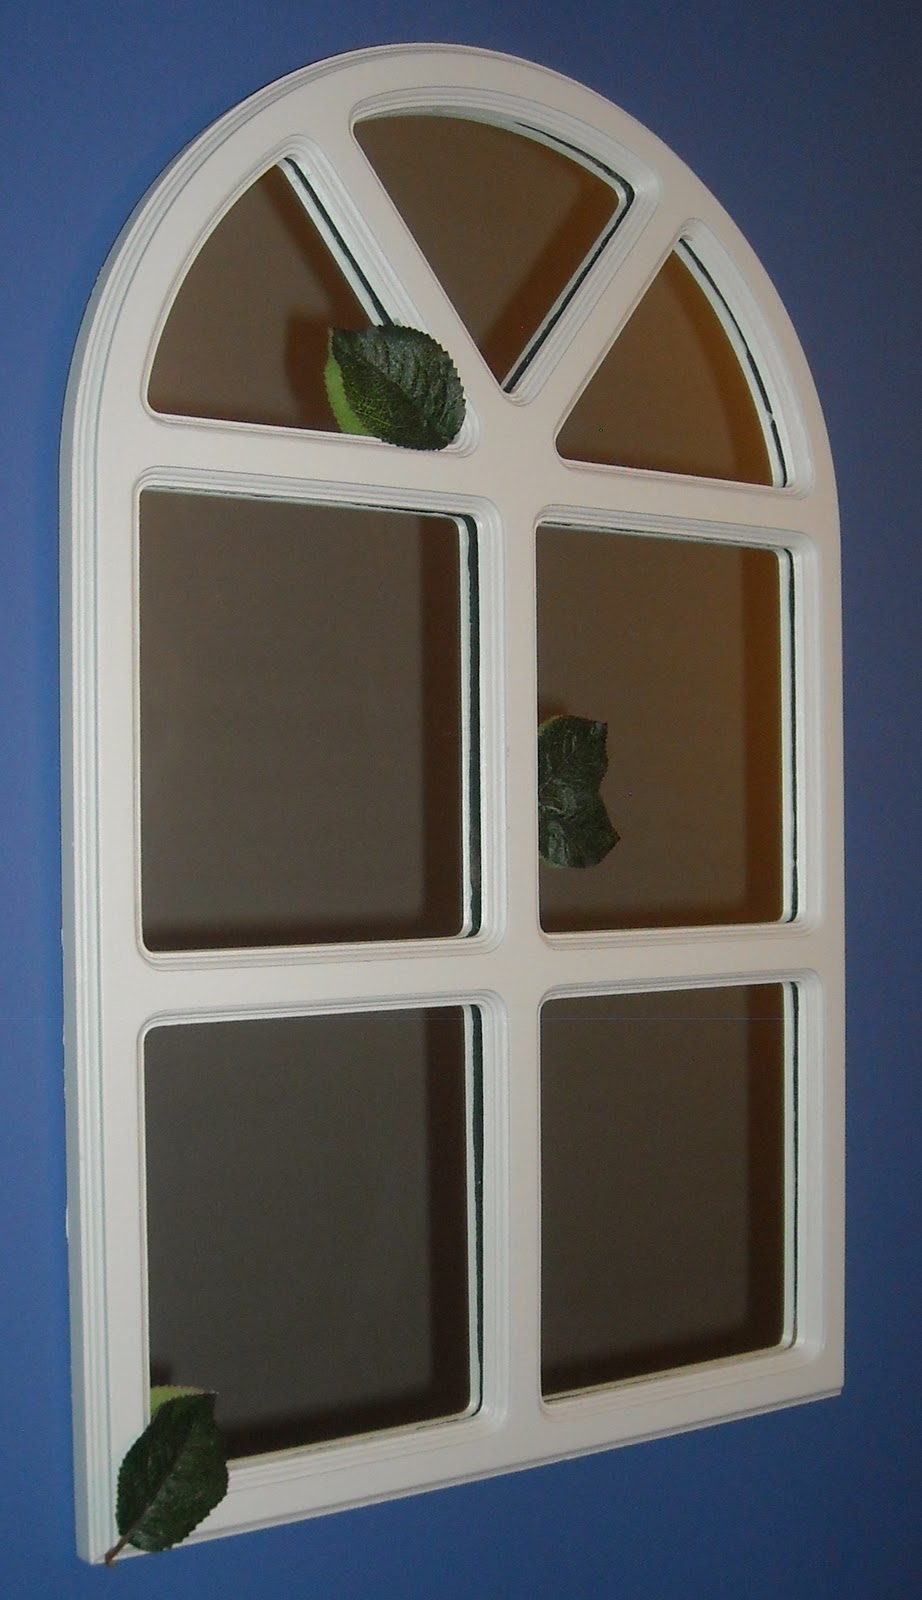
I found this hunter green arch frame, in need of a little love, about a year ago for $2.00 at a tag sale and haven't had time to make it over until this past weekend. Here is a "Before" picture - dirt and all!


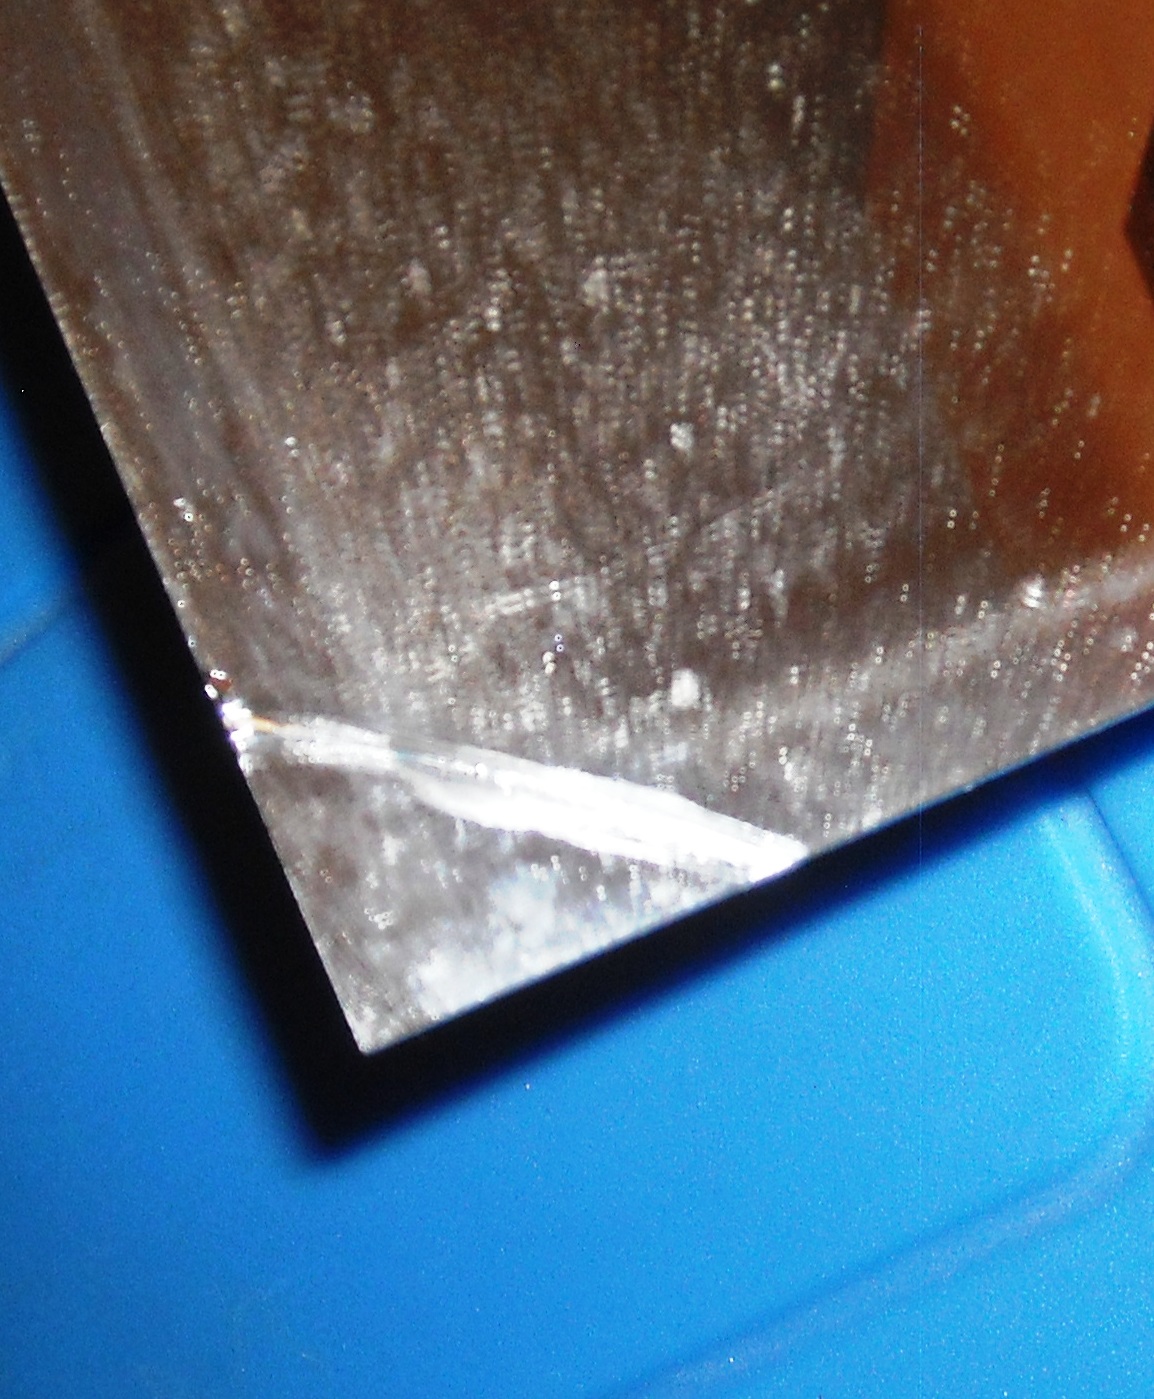
I was going to tape off the mirror part to paint the frame when I was pleased to discover that the mirror was able to be detached from the frame. However, in my excitement, I cracked a corner of the mirror - doh!
With a little tacky glue, I glued the corner back on and hoped it wouldn't be too noticeable by the end.


Next, I added two coats of a light green paint to the frame, breaking in between so it could fully dry. This frame is going on a dark blue accent wall and the rest of the room is this same light green color.


Because I had painted the frame flat on the newspaper, I had to do a tad bit of sanding on the backside to make sure the edges were clean and neat. After that, I cleaned the mirror and put it back into the frame, securing the rivets on the back and also adding some hot glue on the corners for added staying power. 


Once the frame was put back together, I added a few fabric leaves for effect...and also to cover that pesky little crack in the bottom corner, from earlier. 


And finally, here is the frame hung in its proper place; the hallway entrance to our bedroom. 


It looks great against the accent wall - for just a couple of dollars and a few hours of work, I couldn't have found a more perfect wall hanging in any store!

Tip Junkie handmade projects

9.20.2011

From the Archives - Eternity Sweater Scarf

One of my favorite projects last year was an sweater scarf, made from two sweaters that were no longer in my wardrobe repertoire. The turquoise sweater is a little small and the gray hooded sweater coat is too overwhelming for my short frame.  They both have a ribbed texture so mixing the different colored sections added a fun twist to my final product. 


I cut off the arms, carefully along the seam as well as the hood from the gray sweater, set aside for later. The cut rectangle sections from each sweater using as much as you can. I also used the pieces from the sleeve, which made my scarf extra long, for more looping. Then I pinned all of the sections, edges out and without repeating.


This next part takes a little time but it's not too difficult. Sew all of your pieces together, then match up the two long pieces you'll have and sew them together, leaving one end open so you can turn it right-side-out. 

You can use one sweater to make it all the same color or mix and match like I did. Here are the final results!


I can layer it in the cold weather...


Or for a casual Autumn night.

The best part - it matches my favorite ankle boots!

I originally inspired by a tutorial from Adventures in Dressmaking. Be sure to check out her site for other recycled and upcycled sewing projects.

8.24.2011

Nursery Lamp Makeover

As I've mentioned over the past week, I threw myself into a project for the nursery - it's the first time I've had the energy or the inspiration to come up with a new crafty project in quite some time.

Looking at cribs, play yards and nursery decor can be overwhelming so I decided to create some custom pieces for the new nursery that will be appropriate whether the baby is a boy or a girl. (Only one more week until we hopefully find out!)

Starting with a plain lamp that used to be in our living room but we recently replaced - here is the 'before' picture: 


There are 6 panels in the shade so I decided to use an alternating design, starting with some cute monkey fabric that I had stashed away. First, I measured each panel and marked them with small tabs since each one had a slightly different measurement.


Then I created a form out of scrap cardboard so I could trace it on the fabric for accuracy. I had to make three different forms (and mark each cut piece) so that the panels lined up correctly.

Once I had the panels cut out, I set them aside and got to work on the panels that would not have the fabric on them. 

Using a full bottle of bright yellow, soft, fabric plaint and a regular paintbrush, I painted the alternating panels as well as the top and bottom trim of the lampshade. 


After letting the paint dry completely, luckily I only needed one coat, I began working on the fabric panel parts. I spread a thin coat of Modge Podge on the back of the fabric panel and then placed it on the corresponding panel. 
The Modge Podge made the panels a little longer and wider so since the panels were measured very specifically, they had to be trimmed while wet which was a little messy. Since I knew I was adding a trim to the panels afterward, it would have been smart to cut the fabric slightly smaller than my original measurements.

Once the panels were lined up, I took small amounts of Modge Podge on my fingertip and spread another thin layer on the front to secure it to the shade. Repeat this step for all three panels. 

While the panels were still sticky, I used Tacky Glue to attach faux pearl trim to the edges of each fabric panel. This helped hide any rough edges and blend the panels in with the painted sides. 

Lastly, I used the Tacky Glue again to attach bright yellow pom-pom trim to the underside of the lamp shade so that only the pom-poms hung down from underneath. It helps to use a clothespin to hold the start of the trim while you attach the remainder, approximately 6 inches at a time until you reach the beginning. 


Here is the final product, with the matching wall art that I created last weekend - 


Creating your own nursery decor is easy - scope out your own items, tag sales or thrift stores for your starting piece and add your own flair from there. Hey, if Jessica Alba can do it, so can you!

Tip Junkie handmade projects

8.17.2011

Getting Inspired by Crafty Celebrities

Last weekend, Jessica Alba gave birth to her second child, daughter Haven Garner. She's never been shy about her love for crafts, even Tweeting this statement just over a month ago: 


Jessica Alba Jessica Alba on Twitter 
Headed 2 do some flea market furniture shopping for nursery. Do any of u like antique furniture shopping? Got before n after pics?
Updated 38 days ago via Twitter for BlackBerry®


Inspired by her love for breathing new life into previously-loved items, I decided to create a decor piece for the nursery that we are putting together in our own home. Here is the before picture - be on the look out for my tutorial and results, coming soon!


7.16.2011

Wooden Frame - Project Makeover

One of my favorite things to do when I want to spruce up the house is to change around the decor, including the many framed pictures we have on display. I'm not too concerned about making sure all the frames match because I like the different styles and colors all mixed in. Plus, it makes it easier to recreate boring old frames that can easily be picked up at tag sales.

For my niece's birthday, I decided to take a plain, brown wooden frame, give it a makeover and include a family picture in there that she's sure to appreciate as she gets older.

Here is what it looked like before:


With some trusty spray paint, in a light purple (don't worry, I was sure to wear a protective mask!), glitter paint and a decorative iron-on, attached with hot glue, here are the final results -


I was thrilled with the results and as it turns out, it matches her room perfectly! Use your imagination to re-purpose any frames you might already have or that you pick up in your travels. 

What projects are you working on this weekend?

7.10.2011

Before & After - Doorstop Project

Project: a doorstep that I received from my Nana's house, looking a little worse for the wear, complete with rust spots. I knew I could give it a makeover and find a home for it here. 

Needed for makeover: a can of Rustoleum in dark bronze, small purple gems and gold glitter paint

Approximate time: 1 hour (not included time for drying in between spray paint coats)

BEFORE

AFTER

7.05.2011

Crafty Links - Babycakes Approved

After a nice, relaxing break for the holidays, I'm ready to jump back into the week with some crafty links!

6.26.2011

Thrifty Weekend Finds

In addition to my weekend crafting plans (still in progress, by the way), my hubby was nice enough to take me to a local indoor flea market yesterday. I love finding items that can be given a little love and made into something brand spanking new for our home. 

My favorite discovery was this spice/book rack - I knew with a coat or two of spray paint that it would look perfect to display some of the smaller, glass items that have been stashed in the cabinet. Since we have a lot of wood in the living room, I thought it would look good with a black finish, instead of the original wood. I have many black frames and decorations around the room so I think this will fit right in.


Another cute but dirty discovery is this arch mirror. My plan for this is to paint it a light green and hang it on the accent wall in our bedroom. Even though construction has been finished for some time, I still haven't finished the wall decorations. 


And finally, this little sleigh basket will have to wait until Winter so I can find the perfect use for it but I love it none the less. With some red, glossy spray paint and cinnamon scented pine cones - this will look adorable on a small accent table just about anywhere in the house!


I couldn't be happier that all these items cost me less than $10. I'll be sure to post before and after pictures once I have them...

6.08.2011

Decoupage Candle Holder Tutorial

Awhile back, I posted the results of one of my weekend projects - some fun zebra decoupage candle holders. I wanted to post a simple tutorial for anyone looking to make these themselves. 

I started with a set of small wine glasses, passed along to me in a box of craft supplies by my grandmother. I cut up some zebra tissue paper into rectangles, not too worried about them being the same size but not making them too small either.


With my trusty bottle of Modge Podge, I got to work attaching the tissue paper to the glass with a small paint brush...


You don't have to be too careful during this process, a little bit of texture looks very cool when it's all dried.


When I was finished with the tissue paper and the candle holders were dry, I added a line of strung sequins to the top rim. Voila!


This set was the first sale of my first craft fair of 2011. I would definitely like to make more! Finding glass pieces to use is easy if you check out your local consignment shop or tag sales. Here is another variation on this project, using hot pink tissue paper, black sequins and leopard print ribbon. 


And finally, one more candle holder project using this technique...


I always sell these with LED candles inside so they are safe for homes with children and pets.

Hope you enjoy this tutorial and happy crafting!

6.01.2011

From the Archives - Crafty DIY Bird Feeders

I'm using all my might to "wish away" the impending storm, set to hit parts of New England. While I sit here and hope that the tornado activity stays away from CT, here's one of my favorite posts from the archives:

Here are a few of my favorite tutorials that I have discovered for making your own crafty bird feeder.

First up is the idea that inspired my post today - a fun project with a rustic feel & nature-friendly results via Cassy as of Lately. The best part is you probably already have everything you need in the house!

This cute idea I recently came across is an easy weekend project and would work perfectly if you have young kids around. Courtesy of My Own Ideas, click here for the tutorial to make these pretzel birdie treats. 


Another fun idea to do with the family, requires simply a bag of bird food, gelatin, twine and some fun shaped cookie cutters. (Alpha Mom)


And my personal favorite, because I love any teacup and teapot related crafts, this tutorial comes from Tip Nut.


5.10.2011

Crafty Links - Babycakes Approved

I can't believe it's already Tuesday! Let's jump right into some fun links...


Hope everyone is having a great week so far!

5.03.2011

Crafty Links - Babycakes Approved

It's Tuesday so I won't waste any time - here are your fresh & hot crafting links!
  • This might sound weird but I have been looking for a stand-up coat rack for some time now. I have found that I either don't like the style or they are far too expensive. I'm not sure if I'm handy enough to make this wooden coat rack but voila - problem solved, thanks to Stephanie@Home

Don't you just love this idea? Her instructions were very easy to follow. I hope you all are having a great week so far!

4.26.2011

Crafty Links - Babycakes Approved

It's Tuesday so let's not waste any time and jump into some crafty links!

    As always, please support your local craft community and buy handmade.

    4.20.2011

    Homemade Starburst Prom Dress

    The web is a-buzz today with the video of Wisconsin teen, Kerrin Frey, whose mother made her prom dress out of Starburst wrappers. Made from thousands of wrappers over the course of 6 years, this colorful outfit is definitely one-of-a-kind! Lucky for Kerrin, the prom theme just happened to be Candyland!


    4.16.2011

    Simple Paint Chip Projects

    I decided a long time ago that the most fun part of any home improvement project, besides the completion, is picking out paint colors! While I spend the weekend tormenting Bunch with carpet samples and trying to find the perfect accompanying paint shade, I wanted to share some inexpensive paint chip card crafts from some very creative people: 


    Or try this simple Easter garland, a perfect project for kids too! Check out Modern Parents, Messy Kids for more projects for the little ones.


    And finally, here is a project guide for fancy little notepads, in the shape of a mini-purse, from Infarrantly Creative. This would make a cute favor for shower or birthday party!

     
    Now I'm not suggesting that you go and loot your local hardware store but if you have any of these samples laying around after your next home improvement project, considering holding onto them for one of these ideas.

    4.10.2011

    No-Sew Projects for Spring

    It's finally feeling like Spring in New England and I'm spending my Sunday relaxing. Tomorrow begins the makeover to our bedroom! So after spending the afternoon having some girl time with Beth, I have my work cut out for me to make sure we're ready for construction to start. One of the first craft fairs that I did, oh so many years ago, Beth came and was nice enough to sit with me all day. It was a damp day with many crafters not even bothering to show up so expectations were low but it turned out to be a successful show with lots of laughs and sales. 

    We talked about her very first craft project, which was a no-sew fleece blanket for her mom. She loved it so much that she made a couple more as gifts and for herself. Spending time with her today reminded me of that so I thught it was only fitting to post some fun no-sew project links. The fleece blankets are more for winter so here's some fun variations on that idea.

    Enjoy the rest of your Sunday!

    4.07.2011

    Featured Artist: Dr. Grymm

    Today I would like to try something a little different and introduce you to one of the most talked about Steampunk artists around - the amazing Dr. Grymm. His work was recently included in an online feature titled "Thirteen Astonishing Pairs of Steampunk Goggles" by 1-800-Recycling. The industrial sewing goggles were made for his dear wife, Mrs. Grymm and are my favorite of the group!


    Dr. Grymm's work has been displayed everywhere from Oxford, England to Las Vegas to the Steampunk World Fair in New Jersey. 

    You might even recognize this Eye-Pod from the Black Cards video for Club Called Heaven.


    Or maybe you've seen his work on the book shelves -


    Be sure to follow his adventures at the Dr. Grymm Laboratories blog. And on Facebook.


    "Steampunk cannot be explained away with one man's definition. It takes many voices to create this world and all are worth hearing." - Dr. Grymm