9.30.2011

Decorative Fall Arrangement Vase and Frame

I saw a great idea online the other day, to use a vase as a picture frame so I decided to add a twist on that idea by making a fall decor mantle piece that doubles as a frame.

Here are the supplies that I started with:

  • Apple ornaments (bought at a tag sale for $0.50)
  • Pumpkin accents (can be found at any craft store for about $2-$3)
  • Pine cones, in differing sizes (real or decorative, I got these off of Freecycle)
  • Raffia decoration (also from Freecycle)
  • Krylon spray paint in Caramel Latte color
  • Cynlinder vase


I started by trimming my picture with a paper cutter, to ensure straight cuts, and lining it up in the front of the vase. I put two small pieces of clear tape on the sides to keep it in place. Then I started stacking the pine cones, apples and pumpkins on the bottom, with some raffia to fill in the gaps. 


I spray painted a handful of the pine cones and pumpkins to give the arrangement more character. I didn't cover them entirely and liked the way that effect looked.


 I continued to layer the pieces until the vase was just past the top. Here is the view from the back: 


And the view from the front - I love this black & white photo of me and my hubby dancing at my friend Kerry's wedding last year.


This could easily be used for any season; replace the pine cones and pumpkins with Christmas bulbs or plastic Easter eggs for Spring. I just love the idea of using interesting glass pieces as frames!
Tip Junkie handmade projects

9.28.2011

Painted Boston Red Sox Pumpkin

Tonight is the last night of regular season MLB baseball and like every other Red Sox fan, I'm on the edge of my seat hoping that they can lock up a Wild Card playoff spot. Here's one of my favorite crafts ever - a fall pumpkin that I hand-painted to show my spirit!


Helpful tip - I covered the entire pumpkin with a clear coat of spray paint to extend the life of the design.

9.26.2011

Arched Mirror Frame Makeover

I found this hunter green arch frame, in need of a little love, about a year ago for $2.00 at a tag sale and haven't had time to make it over until this past weekend. Here is a "Before" picture - dirt and all!


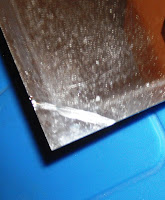
I was going to tape off the mirror part to paint the frame when I was pleased to discover that the mirror was able to be detached from the frame. However, in my excitement, I cracked a corner of the mirror - doh!
With a little tacky glue, I glued the corner back on and hoped it wouldn't be too noticeable by the end.


Next, I added two coats of a light green paint to the frame, breaking in between so it could fully dry. This frame is going on a dark blue accent wall and the rest of the room is this same light green color.


Because I had painted the frame flat on the newspaper, I had to do a tad bit of sanding on the backside to make sure the edges were clean and neat. After that, I cleaned the mirror and put it back into the frame, securing the rivets on the back and also adding some hot glue on the corners for added staying power. 


Once the frame was put back together, I added a few fabric leaves for effect...and also to cover that pesky little crack in the bottom corner, from earlier. 


And finally, here is the frame hung in its proper place; the hallway entrance to our bedroom. 


It looks great against the accent wall - for just a couple of dollars and a few hours of work, I couldn't have found a more perfect wall hanging in any store!

Tip Junkie handmade projects

9.23.2011

Cute & Festive Halloween Cupcakes

My plan is to spend some time this weekend working on a few tag sale/thrift store treasures that need a little love. I'm excited to display them around the house when finished...

In the meantime, I've been discovering some amazing baked confections this week online and if I had all the time in the world - I would definitely be making all of these different cupcakes! Click on the links to view the full tutorials.


The strange thing is that I don't even like actual candy corn but there's no denying how cute cupcakes look with candy corn decorations. 

What are you cooking up for the Halloween holiday?


9.20.2011

From the Archives - Eternity Sweater Scarf

One of my favorite projects last year was an sweater scarf, made from two sweaters that were no longer in my wardrobe repertoire. The turquoise sweater is a little small and the gray hooded sweater coat is too overwhelming for my short frame.  They both have a ribbed texture so mixing the different colored sections added a fun twist to my final product. 


I cut off the arms, carefully along the seam as well as the hood from the gray sweater, set aside for later. The cut rectangle sections from each sweater using as much as you can. I also used the pieces from the sleeve, which made my scarf extra long, for more looping. Then I pinned all of the sections, edges out and without repeating.


This next part takes a little time but it's not too difficult. Sew all of your pieces together, then match up the two long pieces you'll have and sew them together, leaving one end open so you can turn it right-side-out. 

You can use one sweater to make it all the same color or mix and match like I did. Here are the final results!


I can layer it in the cold weather...


Or for a casual Autumn night.

The best part - it matches my favorite ankle boots!

I originally inspired by a tutorial from Adventures in Dressmaking. Be sure to check out her site for other recycled and upcycled sewing projects.

9.18.2011

Big Weekend - New Car

As I've mentioned a few times in the last month - we have been on the hunt for a new vehicle. We finally found the perfect car, thanks to some patience on our part and the fantastic service at CarMax. We decided that we needed something a little roomier in preparation for our new addition and found that in a Ford Escape. 


I hope you can forgive me for my lack of crafting this weekend but we spent most of Saturday purchasing the car, along with the assorted paperwork that was involved. And Sunday was spent cleaning the garage so we can fit both vehicles inside. I'm sure my hubby would have liked to skip that part!

Hope you all had a lovely weekend, no matter what you did...

9.15.2011

Beaded Lamp and Fan Pulls

My little brother is just about settled into his new digs and he asked me to make him a couple of ceiling fan/lamp pulls. He wanted one with a turtle, since he has been obsessed with them for as long as I can remember, and one with a butterfly to honor the memory of our Nana. They were supposed to be a birthday gift but since I was without power (and supplies) the week of his birthday - he will be getting them this weekend instead. What do you think? 


9.13.2011

Crafty Links - Babycakes Approved

I'm back on track and ready to post some crafty links on this sunny Tuesday -
Hope your week is off to a great start! 

9.10.2011

Deal of the Day

While my Pumpkin Chocolate Chip Muffins are in the oven (smelling delicious!) and my newest project, a memory box for the baby, is drying from the first coat of white paint, I thought I would share my latest Deal of the Day. 


I picked up this package of 8 inch paper stencils from Plaid for only $0.97 at Michaels! Includes all letters of the alphabet! The package shows them used on fabric pillows but I'll probably try them out on some wood panels that I found in the garage, to make something for the nursery. I'm hoping to begin working on it this week...

9.08.2011

Pumpkin Chocolate Chip Muffins

This is definitely a recipe I will be trying out this weekend! A big thank-you to Oopsey Daisy for posting a delicious recipe for Pumpkin Chocolate Chip Muffins. I hope Allison won't mind my re-posting this on a rainy Thursday - just the thought of them is brightening my day!

*******
3 1/3 c. flour
2 1/4 c. sugar
2 tsp. baking soda
1 tsp. cinnamon
1 tsp. salt

2 c. pumpkin
4 eggs
1 c. oil (May also substitute 1 c. applesauce instead!)
2/3 c. water
1 tsp. vanilla

1 c. chocolate chips (I’m not gonna lie.  I usually add many more!)

Mix together first 5 ingredients.  Make a well and add liquid ingredients.  Mix in chocolate chips.  Spoon into muffin tins.  Bake at 350 for 15 minutes.  Makes about 2 1/2-3 dozen muffins.

If you’re in the mood for pumpkin bread, this make a yummy pumpkin bread too!!
*******

I'll be sure to let you know how these turn out - I have a feeling they will be perfect to satisfy any pregnancy cravings I might be having :)

9.06.2011

The Unofficial Start of Autumn

With Labor Day having come and gone, along with the fact that the weather is hovering around 65 degrees today - it's obvious that Autumn is upon us! As I get ready to embark on some new, fun craft projects for the nursery, here are some fun Fall crafts to get you in the creative spirit.


What crafty plans do you have in the works for the changing of seasons?

9.02.2011

Babycakes Baby Announcement

Despite all the stress of this hurricane and the residual effects, Bunch and I found out some incredibly exciting news this week...


We secretly had a feeling that this little bean was a boy and it was truly amazing to see the baby moving around on the sonogram. Everything is going smoothly so far - hooray!