Showing posts with label project of the day. Show all posts

12.07.2011

How to Make Tile Coasters

Here is a fun project that will make a great gift for the upcoming holiday season! Follow this easy tutorial and in one afternoon, you will have a wonderful gift for neighbors, co-workers, teachers, etc! Or pair with a bottle of liquor or 6-pack of beer for the guy in your life - they are always so hard to buy for :)

Here are my supplies, as seen in the picture: 

  • Tiles - any size, any style (the ones I used are 1x1 inch, already spaced - from Home Depot $4.99, in blue & brown)
  • Tile setting mat - sticky plastic to hold the tile in place
  • Cork board - this should be sturdy, as it will be the base of the coaster
  • Grout - any color, feel free to experiment
  • Float - to spread the grout (these can be found at Home Depot)
  • Sponge - to clean off groat after is has dried 
Not shown:
  • Scissors 
  • Table covering
  • Plastic gloves 


The first step is to determine how big you want your coasters to be. I decided on 4 x 4 rows, cut that and then cut the tile placement mat and cork backing to match. 


Then, with the cork on the bottom, line up the tile sticky mat and place that on top to match, finish by securing the tiles to the top, like this: 
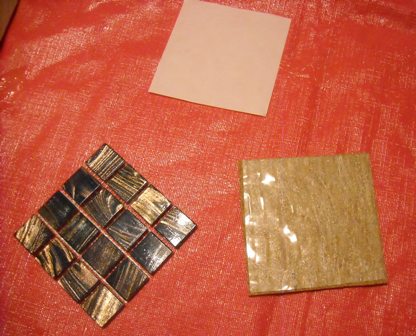

Because we are using the tile placement mat, there is no need to wait between setting the tile and applying grout. For this project, I used a sandstone colored grout. With your gloves on to protect your skin, use your float to start filing in the grids of your coasters. 

After finishing the top, you'll need to go back and carefully fill in the sides with grout as well. This will require some light sanding after you are done.


When I was finished with both sets of 4, it was time to let them dry and rest up!


I made the rookie mistake of leaving the grout on too long but the good news is that it will still come off. The bad news is that the scrubbing required some extra time and elbow grease. 


Here is one of each of the finished coasters.


And finally - the finished product! Replace the pink and blue ribbon that I used with a fun holiday ribbon and stick in a few small ornaments decorations or Christmas flowers instead.


10.21.2011

Knit Sweaters Needed for Penguins

In New Zealand, a knit shop has put out a call to knitters to knit sweaters for wildlife that has been affected by the oil spill. The idea is to keep the penguins warm until they can be scrubbed down and to prevent them from ingesting the oil while they preen.  


If you are interested in knitting a sweater for a penguin to donate, please click on the link below. (I wish I knew how to knit but it's on a long list of crafts that I don't know how to do)


(Photos from MSNBC - Today Show)

7.06.2011

Summer Favorite - Mom's Zucchini Bread Recipe

One of my favorite things about summer is fresh vegetables but every once in awhile it's a fun indulgence to use those veggies to make something yummy!

It's taken me quite some time but I finally have my mother's zucchini bread recipe - it might not be the healthiest recipe but I promise it'll be moist and delicious.
  • 2 cups sugar
  • 4 eggs
  • 2 cups shredded zucchini
  • 1.5 cups oil
  • 3 cups flour
  • 2 teaspoons baking soda
  • 2 teaspoons baking powder
  • 1 teaspoon salt
  • 1 teaspoon cinnamon
  • 2 teaspoons vanilla
  • 3/4 cups pecans or walnuts (optional)

Put zucchini in strainer and press or squeeze with hands to get some of the excess liquid out.

In a mixing bowl beat eggs, sugar, and oil together.
 

Stir in the flour, baking powder, soda, cinnamon, salt, vanilla, and walnuts, mixing just until all ingredients are combined. Add drained zucchini. Mix well.
 

Pour into 2 greased and floured 8 1/2 x 4 1/2-inch loaf pans. Bake for 50 to 55 minutes at 375°, or until a wooden pick or cake tester inserted in center comes out with very little or no crumbs clinging to it.
 
I wish I had taken pictures of the breads I made last week but I was so excited to cut into them that I forgot! But if you are lucky, your loaves will look something like this: 

Happy baking!

6.15.2011

Homemade iPad Hat

Check out this handmade iPad hat, worn to the annual Ascot horse race, near Windsor, in Berkshire. 


This is definitely one of the most unique creations I've ever seen! Here are some other fun hats, as seen at this event...


6.13.2011

From the Archives - Decoupage Fabric Plates

Every so often, I like to post popular tutorials from my archives - here is a full tutorial on how to make decoupage plates, using clear glass plates and cotton fabric. Don't let the Yankees fabric fool you, I am a proud Boston Red Sox fan!

Here's what you will need to complete this project: 

  • Round or square glass plates
  • Cotton fabric, in any design
  • Modge Podge, regular or with glitter
  • Scissors
  • Table covering
  • Paint cans to hold the plates while they dry
  • Matte or gloss clear spray paint


Start by finding some inexpensive glass plates, either at the consignment store or home goods store. Wash them and dry them completely. Next, cut the fabric about 1-2 inches wider than the plate you are using.

Put your first plate face down on a paint can and the piece of fabric face down on the table covering. Cover the back of the fabric with Modge Podge, flip it over carefully and cover the front generously as well. Then, lift the fabric off the table and place the design face down so that the design of the fabric is facing out (see picture). Use additional Modge Podge if necessary.

Use your hands to work out any air bubbles in the fabric, from the center out. Depending on the thickness and texture of the fabric, this may take some time. Move the plate to another paint can to dry thoroughly. Modge Podge goes on white and dries clear so you will be able to tell when it is ready for the next step.

Repeat for as many plates as you have. I made 3 New York Yankees plates, a gray & pink bird plate, which are both in my Etsy Store and a black striped plate, which didn't turn out the way I wanted and was scraped before the final step. Here is a production picture of them drying.

Once dry, carefully trim the excess off with a razor blade so that the edge is flush with the plate. (step not shown

In a well ventilated area, place the plates face down again on the paint cans. Using your clear spray paint, spray the backs of the plates completely. 

Finally, clean off any excess glue or fingerprints on the front with glass cleaner and paper towels. 

When you are all finished, your plates should look like this:


Happy Crafting - feel free to send me a link or picture if you try this project!

5.13.2011

Project of the Day

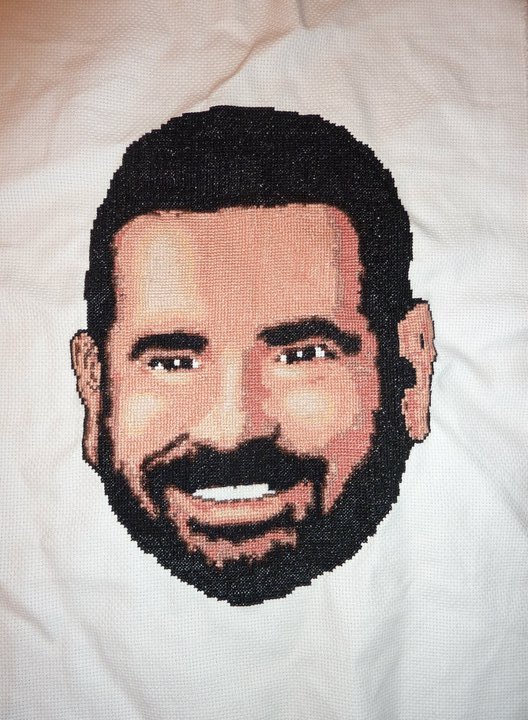
For some reason, I am beyond tired today so I will leave you with this hysterical cross stitch project of the dearly departed Billie Mays while I try to stop yawning! I found this on Craftster by Look What Emily Made.


Happy Hump Day!

4.20.2011

Homemade Starburst Prom Dress

The web is a-buzz today with the video of Wisconsin teen, Kerrin Frey, whose mother made her prom dress out of Starburst wrappers. Made from thousands of wrappers over the course of 6 years, this colorful outfit is definitely one-of-a-kind! Lucky for Kerrin, the prom theme just happened to be Candyland!


4.11.2011

Knit the Royal Wedding

This little video brought a smile to my face, despite the cloudiness outside...


Any sort of knitting or amigurumi crochet impresses me to no end so I got a kick out of all the characters. That must have been a lot of work! If you have attempted this (or any) Royal Wedding crafts and would like to share with me & my readers, please send me an email or leave a comment. 18 more days!